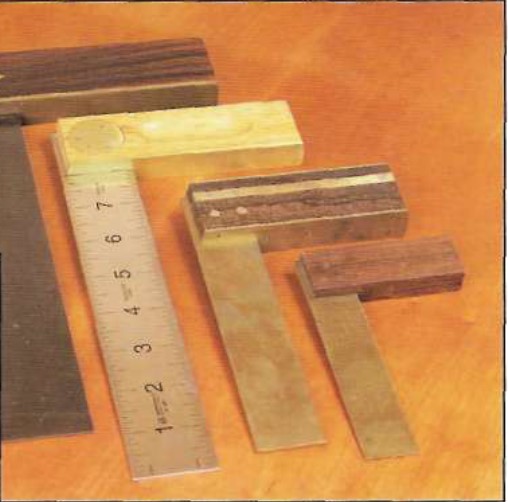
Try squares have long been a mainstay of the woodworker. We use t h e m to lay out and mark boards for joinery, and to check edges to make sure they’re truly square. A try square consists of a metal blade and either a wood or metal stock. Most quality wood stocks have the edges faced with brass to reduce wear. Although an engineer’s square (see page 19) does the same job as a try square, with a higher degree of accuracy, I still like the feel of a wood- handled try square; but when accuracy is critical, I’ll reach for an engineer’s square. A specialized version of the try square is the miter square (inset). It serves the same function as a try square, but the blade is inset in the stock at 45 degrees for checking and laying out miters.
Checking a try square
Just like any other layout took if a try square isn’t accurate, it’s not worth much. To see whether a try square is actually square, place the stock up against a known-flat edge. Then draw a line along the blade and flip the stock over. Align the blade with the line you just drewit should be in perfect alignment. If not, you’ll have to adjust either the stock or the blade by filing it down. (For a nifty alternative to this, see the sidebar below.)
Checking an edge for square
The most accurate way to use a try square when checking for square is to position the blade of the square against the edge of the workpiece. This lets you position the work-piece so that light can shine through from behind to indicate any gaps. The less desir- able method is to place the blade on the face of the work-piece and slide it up until it’s near the end of the work-piece (inset). It’s difficult to see any gaps this way; avoid it whenever possible.
Accurate marking
If you’ve ever watched a draftsman in action, you’ll note that he always places his pencil at the exact point where he wants to draw a line, and slides the square up so it butts up against the pencil. This might seem like a no-brainer, but over the years I’ve
watched a lot of woodworkers do just the oppositeset the square on the mark and then draw the line. The problem with this is that it doesn’t take into account the distance between the square and the center-point of the pencil lead.