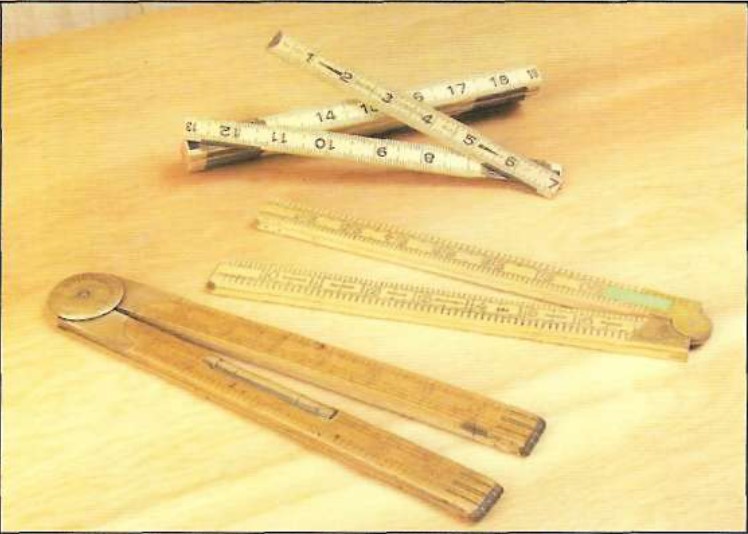
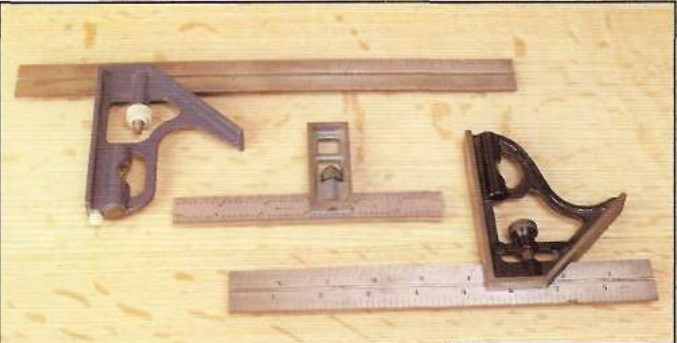
What do you get when you combine a metal rule, try square, miter square, level, and depth gauge into one tool? A combination square. A combination square is a metal rule with a groove in it that accepts a pin in the head of the square. The head has two faces—one at 90 degrees and the other at 45 degrees. When the knurled nuton the end of the pin is tightened, the head locks the rule in place at the desired location. Some heads also incorporate a spirit level, but the short length of the head (typically 4″) limits its usefulness. While most combination squares come with only one head, there are two other accessory heads that are quite useful: a center- finding head and a protractor head that adjusts to any angle from 0 to 180 degrees.
As a try square
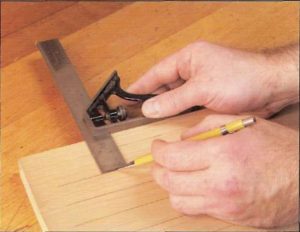
Probably the most ordinary use of a combination square is as a try square. The advantage to using a combination square is that you can adjust the blade to the desired length. Also, since its head is metal, a combination square is usually more accurate than a try square with a wood stock.
As a depth gauge
Another frequent use of a combination square is as a depth gauge. To use one for this purpose, loosen its knurled knob and place the 90-degree face of the head so that it spans the hole to be mea- sured. Make sure all chips are cleared from the hole, and then lower the blade until it bottoms out. Tighten the knurled knob and remove the blade to read the depth.
Parallel lines
By far the most c o m m o n reason I reach for a combination square is that I need to mark out a line parallel to an edge or a series of parallel
lines. The combination square really excels here. Say, for instance, you want to lay out a series of lines on a fireplace mantel where you’re going to carve a set of flutes. Just set the blade the desired distance from the edge of the work- piece, lock it in place, and then butt the head up against the edge of the work-piece. You’ll note that there’s a small notch centered in the end of the metal rule; this is for your pencil (or awl, if you prefer). Position the pencil in the notch, and while holding it firmly in place, slide the square along the edge of the work-piece, keeping steady pressure on the head.