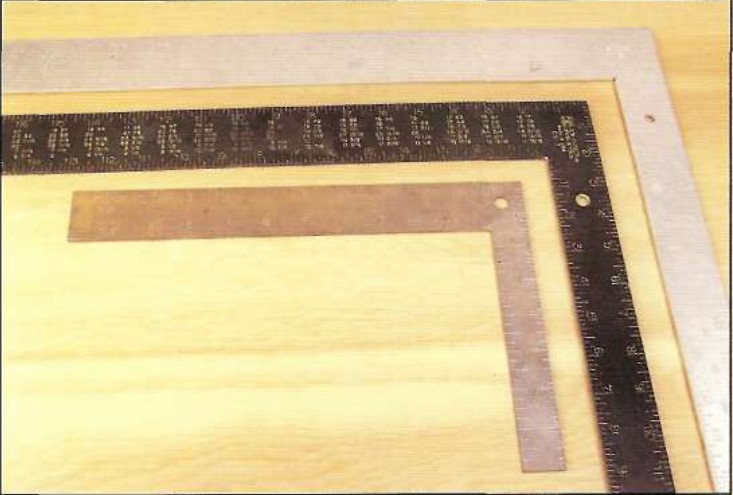
A framing square is another one of the tools that some woodworkers feel belong only in a carpenters toolbox. That’s too bad, because a framing square is quite useful in the wood-shop. The longer legs of a framing square make it ideal for checking larger surfaces, where a smaller try square or combination square won’t give an accurate reading. Framing squares can be found in a number of materials and sizes. I prefer an aluminum square over a steel one, as its much lighter and won’t rust over time.
Checking a framing square
To make sure your framing square is accurate, place it on a work-piece with a known straight front edge. Position the square so the short leg (the tongue) extends just over the edge of the work-piece. Then draw a line along the long leg (the blade) and flip the square over. Slide the square over until the blade aligns with the line you’ve just drawn—it should line up perfectly. If it doesn’t, you can retrue the square by lightly hammering the metal at the diagonal joint between the tongue and the blade. If you hammer on the inside edge, the square will “open”; hammering on the outside corner ‘closes the square.
Accuracy tip
Whenever you’re looking for added accuracy with a framing square, allow the tongue or blade of the square to hang down over the edge of the work-piece and press it firmly against the edge. This ensures that the square will be aligned perfectly with the edge. It’s easy to introduce error here if you simply try to hold the tongue flush with the edge with the square on top of the work-piece.