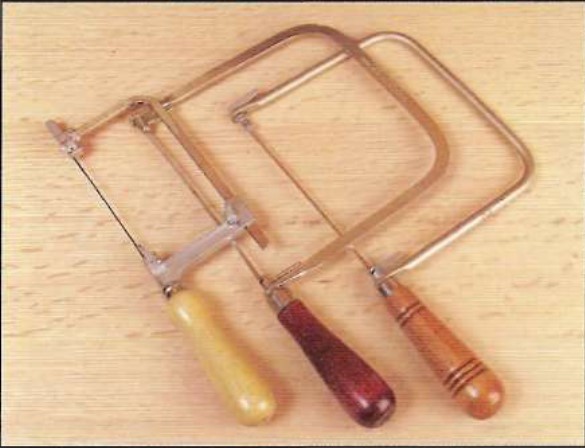
Coping and fret saws are yet other types of frame saws where the blade is held in a tensioned frame that is adjustable. Most coping saws accept a 65/8″-long, very thin, narrow blade with fine teeth—typically 15 to 32 teeth per inch. Fret saws often have deeper throats or an adjustable frame, and accept blades with extremely fine teeth: as high a 96 teeth per inch. Both coping saws and fret saws are terrific for cutting curves, making pieced cuts, and getting into tight places. Coping saws have the added feature of a blade that can be pivoted to make it easier to follow a curve.
Anatomy
Blade tension for coping and fret saws is supplied by the steel frame. The blades are usually held in place with cross pins (although older coping saws may use blades with a hook or loop on the ends). These cross pins fit into grooves in metal spigots at the top of the frame and in the handle. The handle spigot threads into the handle and allows for fine adjustment of the tension.
Changing blades
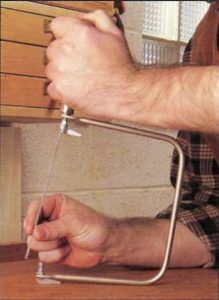
To change the blade on a coping saw or fret saw, start by loosening the handle a few turns. Then position the saw upside down on your bench and press down on the handle slightly to “close” the frame. This creates sufficient slack in the blade so that you can slip the pin at one end of the blade out of the corresponding spigot. To install a blade, reverse the procedure. Insert the blade in one spigot, depress the frame, and slip the other pin in its matching spigot. Apply additional tension by tightening the handle.
Basic use
In most cases, I install a blade so it cuts on the pull stroke. This does two things: It provides better control, and it keeps the blade in tension better than when pushing. Since these blades are so thin and fragile, they have a tendency to over- heat. There are a couple of ways to prevent this. First, use the full length of the blade as you cut. Second, stop periodically and allow the blade to cool.
Delicate cuts
For delicate cuts, such as cutting veneer or other thin materials for inlay or marquetry, the fret saw is the tool to use. The extremely fine teeth let you negotiate curves without angling the blade. The secret to successful cutting is to fully support the thin material (see the sidebar below). Also, it’s important to install the blade to cut down and on the pull stroke. This way the cutting action pulls the material against the bird’s m o u t h (see the sidebar below) instead of away from it, which would cause the thin material to fracture.

